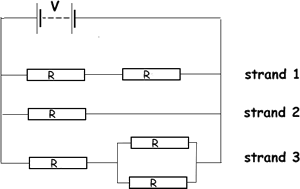
Steps to analyse a circuit Step 1: Split it into strandsA ‘strand’ is a route to/from the power supply that does not branch off midway. Therefore if you have parallel components in series with other components you have to simplify that arrangement before you can do this step. In the above example:
Step 2: Share out the voltages
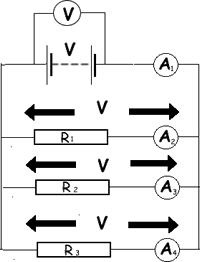
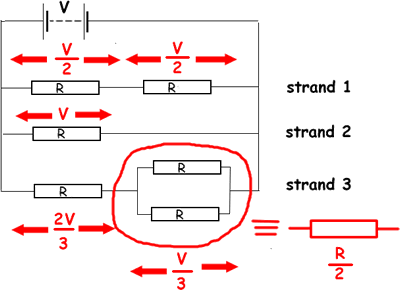
Each strand has access to the full potential difference provided by the power supply. Whatever a voltmeter around the power supply reads is what a voltmeter around the components on that strand will read. We say that the potential or voltage drop across the components is the same as the potential drop across the power supply. That means that the whole of strand 1 (the one with R 1 in it) will have the same voltage across it as the battery does – the reading on the voltmeter. The ammeter and resistor together share the potential drop from the battery. The same is true for each of the three strands in our circuit (from above). Rather than draw in lots of voltmeters get into the habit of putting arrows across each strand to show how the voltage is distributed. It is a good idea to have a marker pen (not green or red!) with you in the exam to do this when you have circuit diagrams to deal with.
Step 3: Work out the current through a componentOnce we have the value of each resistance and the p.d. across each one it is easy to work out the current passing through a component. We just use V =I R.
|
Follow me...
|


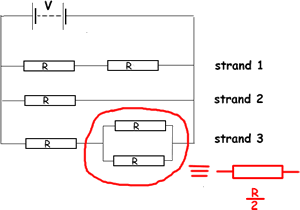
 is equivalent to a single resistor of R / 2 (see the ‘tip’ above) we can therefore re-sketch the circuit or (to save time in an exam!) mark on it in such a way as to indicate this.
 Pure parallel components can be split into separate routes back to the power supply; therefore they each become strands of the circuit. You need to simplify resistor arrangements until you have a simple parallel circuit.


