Concave Mirrors: constructing a ray diagram
It is best to do this using graph paper. Use a 12" ruler and a sharp pencil!
Instructions
- Draw the principal axis across your page.
- Using a compass draw the curved mirror so that it is bisected at the principlal axis.
- Add the chevron shading.
- Label the point that your compass went through C (or 2F) and the point where the line of the principal axis cuts the mirror V.
- Measure CV and put a point F halfway along the principal axis.
- Place your object point (to scale) on your diagram. Add an arrow going from the principal axis to that point (pointing towards it!).
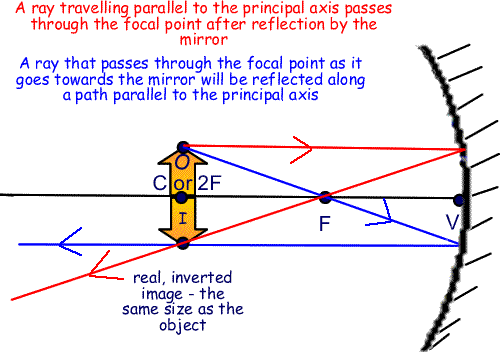
- Take a ray from the object through 2F (or C) to the mirror. Add two arrow heads on it in opposite directions.
- Take a ray from the object point travelling parallel to the principal axis and mak it hit the mirror. (Add the arrow). Now make it reflect so that it passes through F. (Add the arrow)
- Take a ray from the object and make it pass through F on its way to the mirror. (Add the arrow). Make it reflect from the mirror so that it travels parallel to the principal axis.
- If you have drawn your diagram carefully the rays will all cross at one point. That is your image point. Label it and then draw an arrow going from the principal axis to that point.
Summary of image/ object position for a concave mirror
1. Object beyond C
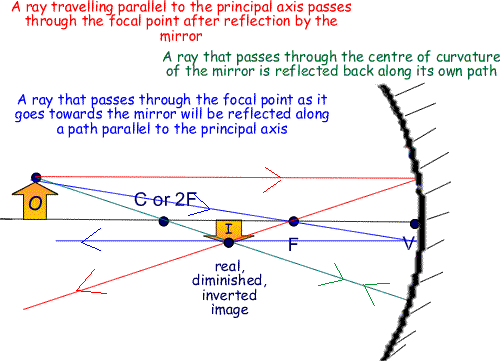
2. Object between C and F
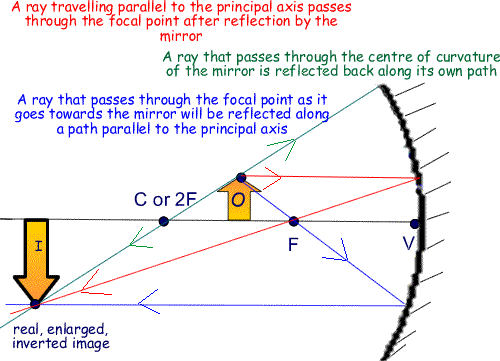
3. Object between V and F
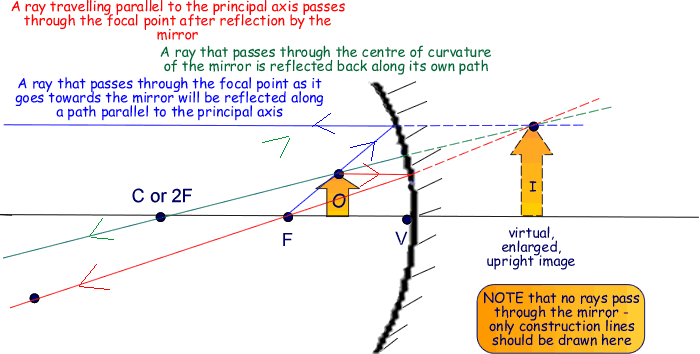
4. Object At F
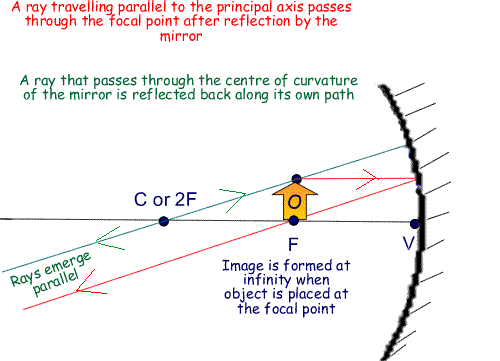
5. Object At C
Is the image formed upright or inverted?
Ray diagrams of concave lenses are constructed from the principal axis line - the object is a point (shown by an arrow, the base of which starts at the principal axis) - the image point when found is then also highlighted by an arrow that originates on the principal axis - that shows you which way up the image is.
Is the image formed real or virtual?
If the image is formed at the junction of rays it is real. If it is formed at the junction of construction lines - drawn out from diverging rays - it is virtual and should be drawn as a dashed arrow..


